Tuft Testing: A How-To Manual
 |
| Tuft testing is an incredibly powerful technique for visualizing airflow. |
Tuft testing is one of the easiest, cheapest, and most enlightening methods for measuring airflow over your car. Tuft testing is so effective because the behavior of the tufts tells you something about both the characteristics of the boundary layer and the velocity at any spot on your car.
Background and Theory
To see why tufts are such a great way to test, we first have to look at the paths that air can take over a car and the various ways we have available to visualize them. Aerodynamicists typically use three different illustrations of airflow: pathlines, streaklines, and streamlines (there are more, but we won't get into those here). If we divide the air into tiny “parcels” of constant volume (the technical term is Lagrangian parcels), the path that a single parcel follows as it moves around and over the car forms a pathline, a record of its movement over a certain elapsed time. Similarly, a streakline is formed from the various time-averaged paths of fluid parcels that have passed through a single point, usually upstream of the car—good illustrations of streaklines are the smoke-flow images that manufacturers often use for publicity. Unlike those two, streamlines are snapshots of the flow at an instantaneous point in time that are everywhere tangent to the velocity i.e. aligned with the direction and magnitude of the flowspeed at every point on the car. CFD programs often illustrate these as continuous lines, from front to back, but attempts to approximate streamlines by using fast camera shutter speeds and bubbles or dye show collections of disjunct lines.
 |
| We're used to streamlines depicted as long, continuous lines when most of the real-world visualization techniques available to us at home cannot show them that way. |
Tuft Testing Starter Kit
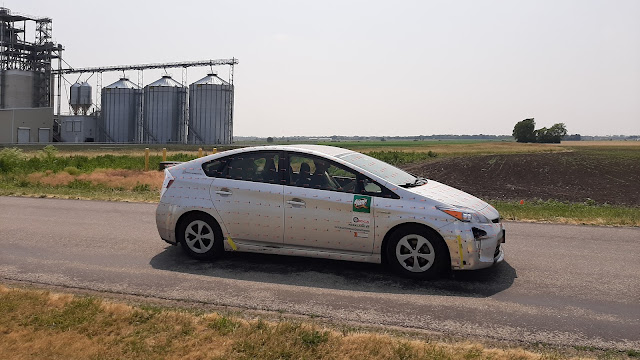
In addition to being a great way to illustrate and visualize airflow, tuft testing is simple and cheap. All you need is some yarn, a pair of scissors, and some tape. Choose a color that contrasts with your car’s paint so you can see the tufts more easily; I like bright orange because it stands out on both of my vehicles and against the blue sky when I’m observing flow over a window. Don’t cut the tufts too long; a couple of inches is plenty. The shorter they are, the more informative they will be; tufts longer than 2-3” will cover too large an area and flap around too much (remember, the whole purpose of these is to see the velocity at a collection of points on the car).
Then, tape them to your car and drive it. I like to use a grid pattern just to be organized, but it really doesn’t matter so long as you cover enough of the surface to see what you’re looking for. I typically use blue painter’s tape, which can be applied to painted surfaces for up to two weeks with no damage, but masking tape, Scotch tape, or Magic tape should work too (avoid duct tape and Gorilla tape unless you enjoy scrubbing sticky residue off your car).
 |
| Ready to visualize some streamlines! |
That’s It?
That really is it. Once you’ve taped tufts all over the surface you want to investigate, drive the car and observe them. You can record them with a cell phone camera, GoPro, or similar device, or station someone outside the car or in another vehicle to videorecord or take photographs as you drive by. Just be careful that camera mounts and other vehicles don’t interfere with the flow over the area you want to see! You won’t get useful results if the tufts are disrupted by a GoPro mount right in front of them.
You don’t need to go all that fast either, so don’t think you need to be traveling at highway speeds or racing around a track. All you need is for the flow to become turbulent, which happens at a fairly low speed on objects the size of cars. 30-35 mph is plenty fast enough; if you’re curious, you can try observing tufts at different speeds to see if there’s a specific speed below which they aren’t reliable or change behavior. The only caveat to this is, as the car’s speed increases, any yaw angle in the oncoming flow from crosswinds will be smaller—something to keep in mind if you test on a windy day (as with other testing methods, I like to drive in multiple directions just to see if there’s a change due to atmospheric wind).
What We Learn from Tufts
The most obvious result of tuft testing is the measurement of which parts of a particular car’s surface have attached flow, which suffer from detachment, and where on the body the flow separates. Flow that is attached will generally show tufts that point in the same direction (some local variation is expected, so they won’t always be perfectly aligned). The rear window of my 2013 Prius, for example, shows clearly attached flow:
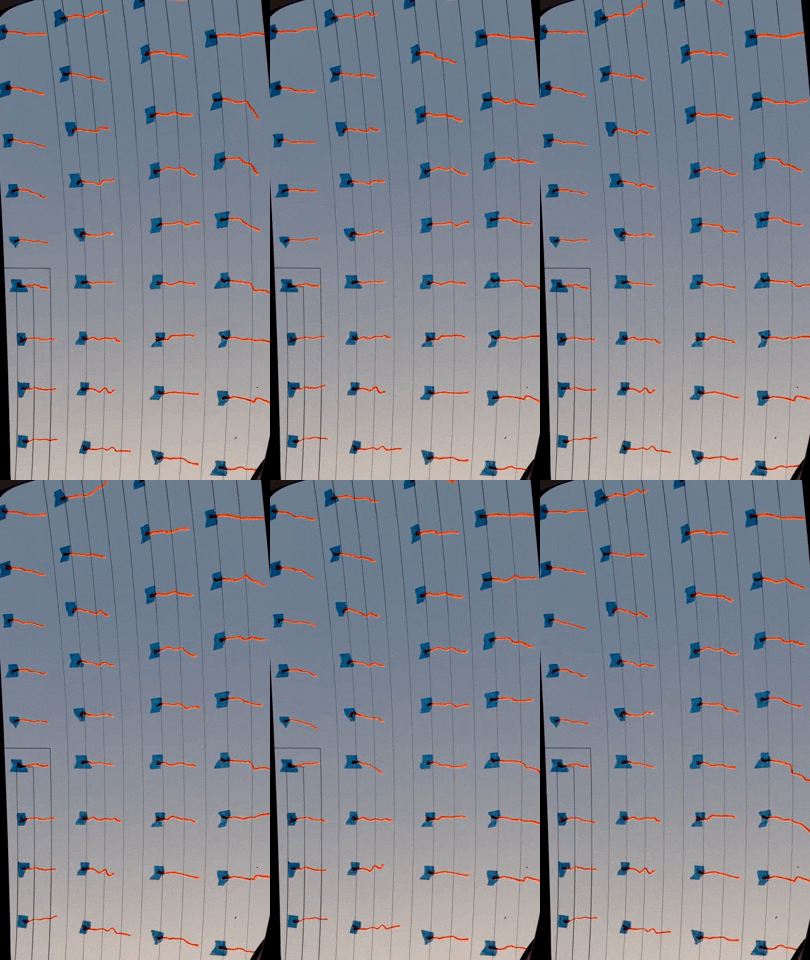 |
| The tufts pointing in the same direction and moving together indicates that flow is "attached"--that is, it follows the downward curve of the window. |
On modern cars, you’ll probably find attached flow over most of the car except for the very back bumper and trunk (what aerodynamicists call the “base”). On older cars, you may find sizable areas of flow detachment. In these areas, the tufts will point in various directions, sometimes even straight up or forwards—in the direction the car is moving. Here, I used a spoiler lip to purposefully detach the flow over the window as an illustration:
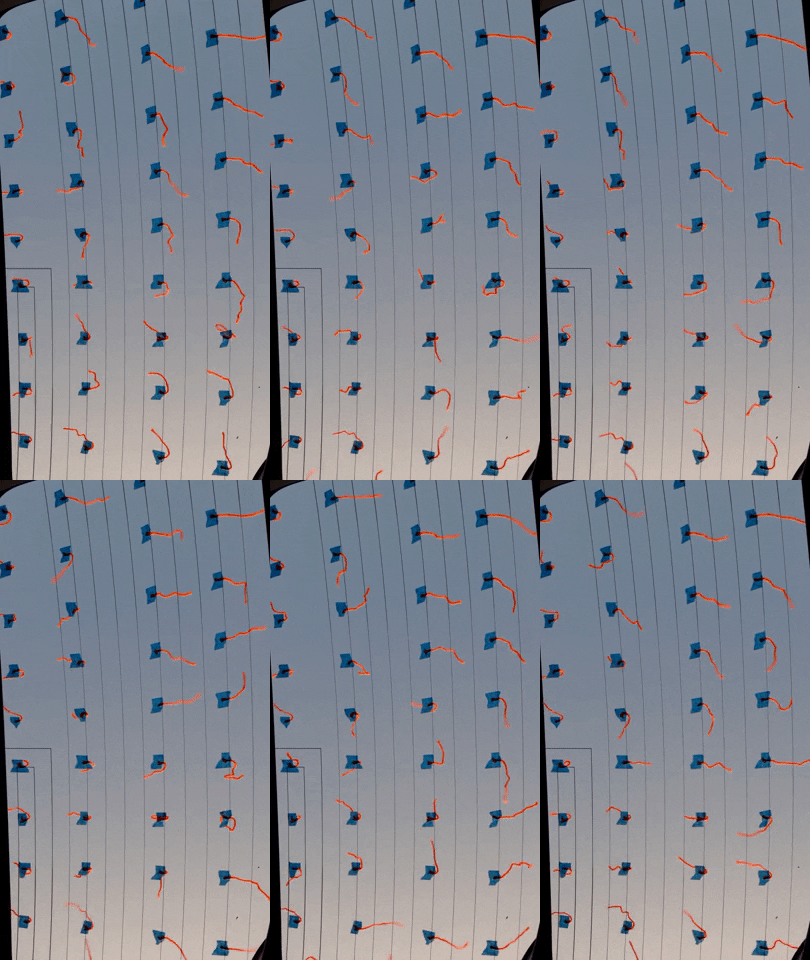 |
| Now the tufts fly around in different directions, showing that flow has "separated"--it no longer follows the curve of the surface, here increasing both lift and drag. |
It's important to note here that there might be local recirculation that is causing the air to move in the opposite direction you expect it to, something that will show up in the tufts. For example, here’s the bed of my truck, first with the tailgate up:
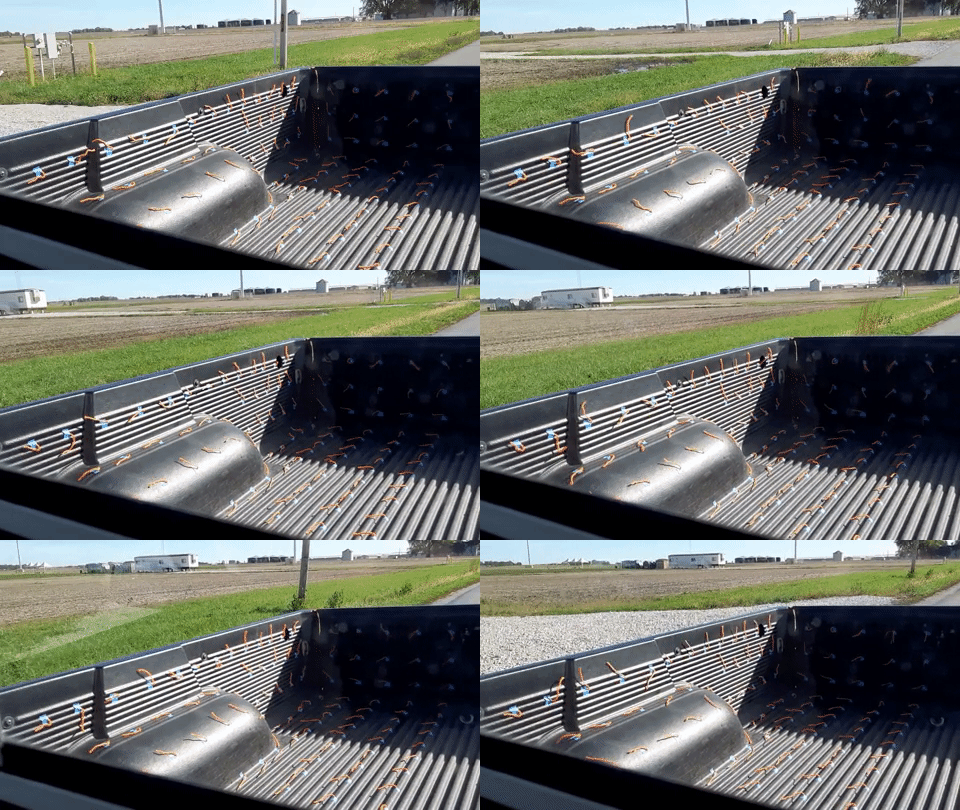 |
| On the sides, the tufts fly around. But on the floor of the bed, the tufts are fairly well aligned and not changing direction much, especially back by the tailgate. |
Here it is again, this time with the tailgate down:
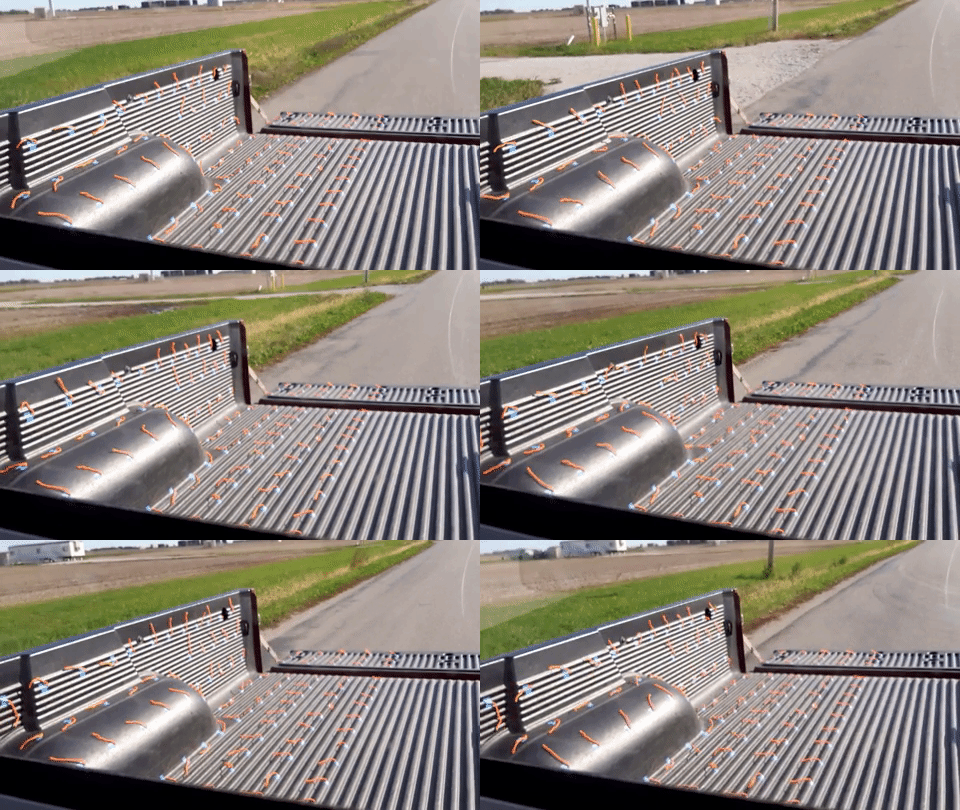 |
| Again, the bed floor tufts are pretty well aligned but the flow is moving in the opposite direction we would expect here! |
It might be hard to see, but in both cases the flow has reversed and is moving generally forward/sideways on the bed surface. This might not be what you expect to see, especially with the tailgate down!

Comments
Post a Comment